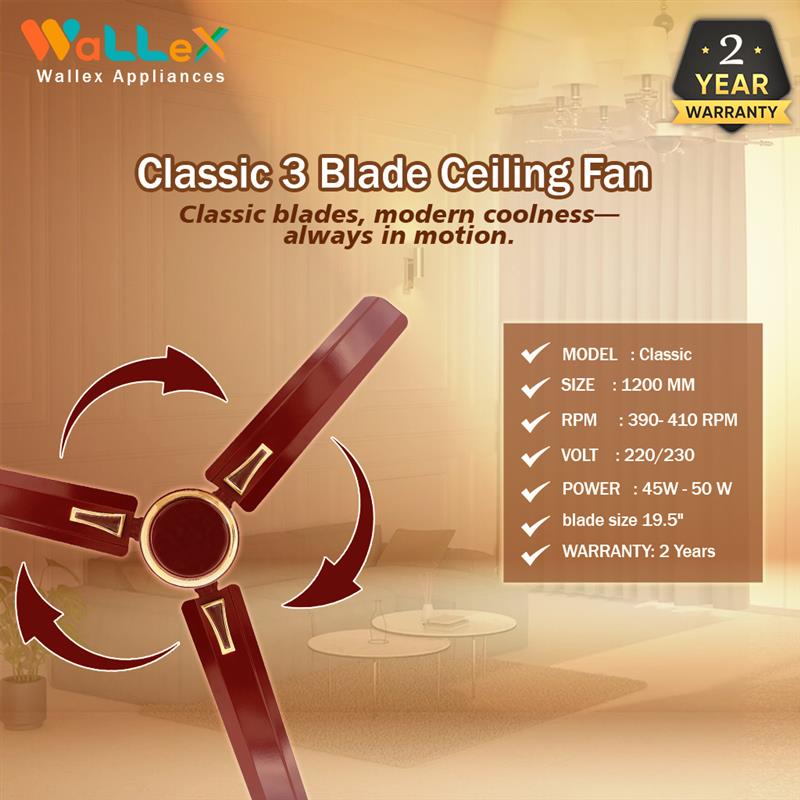
Installing a Wallex fan in your home or office can significantly improve air circulation, maintain comfortable temperatures, and even help reduce energy costs. Wallex fans are widely known for their durability, efficient airflow, and affordable price range. Whether you’re installing a Wallex wall-mounted fan, pedestal fan, or ceiling fan, understanding the proper installation process is essential for safety and optimal performance. This guide will walk you through everything you need to know about Wallex fan installation, from preparation to execution.
Understanding Wallex Fans: Types and Features
Before proceeding with installation, it’s important to understand the type of Wallex fan you’re dealing with. Wallex manufactures several fan models designed for different environments and purposes:
-
Wallex Wall-Mounted Fans
These fans are designed for fixed installation on a wall, ideal for spaces where floor or table space is limited. They are often used in commercial areas like shops, warehouses, and small rooms. -
Wallex Pedestal Fans
These fans are free-standing and adjustable in height. While they don’t require permanent installation, they do require some assembly. -
Wallex Ceiling Fans
These fans are installed on the ceiling and are popular for providing wide-area air circulation in homes and offices.
For this article, we will mainly focus on the installation of Wallex wall-mounted fans, as this is one of the most common types needing detailed installation steps.
Tools and Materials Required
Before you start, gather the necessary tools and materials. Having the right tools will make the installation smoother and safer.
-
Wallex fan kit (ensure it includes mounting brackets, screws, and the fan unit)
-
Power drill
-
Screwdriver (Phillips and flathead)
-
Measuring tape
-
Pencil or marker for marking
-
Wall anchors (if installing on a plaster or drywall)
-
Level (to ensure proper alignment)
-
Ladder or step stool (if installing at height)
-
Safety goggles and gloves (for personal safety)
Pre-Installation Checklist
-
Read the User Manual
Wallex fans come with an instruction manual. Reading the manual will help you understand the specific parts of your fan model and any manufacturer-specific instructions. -
Choose the Right Location
Select a spot on the wall that is:-
Near a power outlet
-
Free from obstructions (windows, doors, furniture)
-
High enough to provide effective air circulation
-
Accessible for future maintenance and cleaning
-
-
Check Wall Strength
Make sure the wall is strong enough to hold the weight of the fan. Concrete walls, brick walls, and sturdy wooden frames are best. For drywall, use proper wall anchors to ensure safety.
Step-by-Step Installation Process
Follow these steps to install your Wallex wall-mounted fan safely:
Step 1: Unbox and Inspect the Fan
-
Unpack all components carefully.
-
Check for any visible damage or missing parts.
-
Lay out the fan components systematically for easy assembly.
Step 2: Mark the Mounting Position
-
Use a measuring tape to determine the height at which you want to mount the fan.
-
Use the mounting bracket as a template to mark the screw holes on the wall with a pencil.
-
Ensure the bracket is level to avoid an uneven installation.
Step 3: Drill the Mounting Holes
-
Wear safety goggles to protect your eyes.
-
Using a power drill, drill holes at the marked positions.
-
If you are installing on drywall or plaster, insert wall anchors to provide additional support.
Step 4: Fix the Mounting Bracket
-
Align the bracket with the drilled holes.
-
Secure the bracket to the wall using the provided screws.
-
Ensure that the bracket is firmly attached and does not wobble.
Step 5: Assemble the Fan Unit
-
Follow the instruction manual to assemble the fan head, blades, and protective grill if not already pre-assembled.
-
Ensure that all screws and clips are tightly fastened.
Step 6: Mount the Fan onto the Bracket
-
Carefully lift the fan and align it with the wall bracket.
-
Depending on the model, the fan may slide into place or require additional screws for securing.
-
Double-check that the fan is firmly attached and does not tilt or shake.
Step 7: Connect to Power
-
Plug the fan into the nearest power outlet.
-
Use cable clips to neatly secure the power cord along the wall if needed, avoiding tripping hazards.
Step 8: Test the Fan
-
Turn on the fan and check for proper operation.
-
Test all speed settings and oscillation functions if available.
-
Listen for any unusual noises that could indicate loose components.
Safety Tips During Installation
-
Always cut power at the main circuit if dealing with hardwired models.
-
Use a sturdy ladder or step stool while drilling or fixing components at height.
-
Never attempt installation alone if the fan unit is large or heavy.
-
Avoid over-tightening screws, as it could damage the mounting bracket or wall.
-
Keep children and pets away from the installation area until the process is complete.
Maintenance Tips After Installation
Once your Wallex fan is installed, periodic maintenance is necessary to ensure longevity and performance:
-
Regular Cleaning
Dust can accumulate on fan blades and grills, reducing airflow efficiency. Turn off and unplug the fan before cleaning. Use a damp cloth or mild detergent for cleaning. -
Inspect Mounting Hardware
Check the mounting screws and bracket periodically to ensure they remain tight and secure. -
Lubrication (If Required)
Some older models may require occasional lubrication for smooth oscillation. -
Check Electrical Connections
Ensure the power cord and plug remain in good condition over time. If you notice any fraying or damage, replace them immediately.
Troubleshooting Common Installation Issues
Even with careful installation, you might encounter some minor issues. Here are solutions for common problems:
-
Fan Wobbling:
Ensure that the bracket is fixed securely and that the wall anchors are properly installed. -
Unusual Noises:
Check for loose screws on the fan body or mounting bracket. Inspect the blades for any imbalance. -
No Power Supply:
Verify that the power outlet is working. Test the fan in a different outlet if needed. -
Poor Oscillation:
If the oscillation feature is not working, check the control knob and internal connections as per the user manual.
Benefits of Choosing Wallex Fans
There are several reasons why Wallex fans are a popular choice among homeowners and businesses:
-
Affordability: Wallex fans offer good quality at budget-friendly prices.
-
Energy Efficiency: Consumes less power compared to air conditioners.
-
Durability: Made with quality materials, Wallex fans are built to last.
-
Versatile Designs: Available in wall-mounted, ceiling, and pedestal models to suit different room setups.
-
Easy Installation: Most Wallex fans are designed for simple, do-it-yourself installation.
Professional Installation vs DIY
While Wallex fans are DIY-friendly, some users prefer hiring a professional electrician, especially for ceiling fans or hardwired wall-mounted models.
DIY Installation is Recommended When:
-
The fan is a plug-in wall-mounted model.
-
The wall is strong enough for installation.
-
You have the necessary tools and basic DIY skills.
Professional Installation is Better When:
-
The installation requires electrical rewiring.
-
You’re mounting the fan on a high ceiling or hard-to-reach wall.
-
Structural reinforcement is required for heavy models.
Environmental Considerations
Wallex fans are an eco-friendly choice when compared to air conditioning systems. They use less power and reduce your carbon footprint while providing effective air movement. In many regions, homeowners combine the use of ceiling or wall fans with air conditioners to reduce energy bills. This method, often called “spot cooling”, is both energy-efficient and cost-effective.
Conclusion
Installing a Wallex fan is a practical way to enhance air circulation, improve comfort, and reduce energy usage in your living or workspace. Whether you choose to do it yourself or hire a professional, following the correct installation steps ensures your fan operates safely and efficiently.
By preparing the right tools, carefully selecting your installation spot, and following the manufacturer’s instructions, you can enjoy the benefits of your Wallex fan for years to come. Regular maintenance and occasional check-ups will further extend the life and efficiency of your fan.
With thoughtful installation and care, a Wallex fan can become an essential part of your indoor comfort system.
- Effortless Ceilling Wallex Fan Installation: Steps Guide
- Whether you choose to do it yourself or hire a professional, following the correct wallex fan installation steps ensures your fan operates safely and efficiently.
- High Speed Ceiling Fan, buy wallex intall celilling fan
Related posts:
 Exploring the Most Popular Large Butt Plugs for Experienced Users.
 Experience Lasting Warmth and Premium Firewood Delivered to Your Doorstep
 The Ultimate Checklist for Selling Your Home Faster Selling your home can be a daunting task—but it doesn’t have to be. Whether you’re relocating, upgrading, or downsizing, the key to a quick and profitable sale lies in proper preparation. With the right strategy, presentation, and timing, you can significantly reduce your home’s time on the market.
 The Ultimate Guide to Bulk Custom Umbrellas and the Best Golf Umbrellas
 Reeltor is the smarter way to navigate Flats for Sale in Goa for the modern generation
 Welcome to Prestige Spring Heights – Budvel’s New Residential Marvel
 Welcome to Lodha Meridian – A Modern Living Experience in Kukatpally, Hyderabad
 Boosting hospitality sales revenue New York | Proven Strategies


